Three weeks, or so, ago I posted our weekly plans, which included painting the back bathroom. I promise it wasn’t just a random post. It took me a while to find the mojo to get going. Especially after all those stripes. But I gathered all my supplies and set out to “Renew the Back Bath” . The space is relatively new compared to the rest of the house, so just a few minor touch ups were needed.
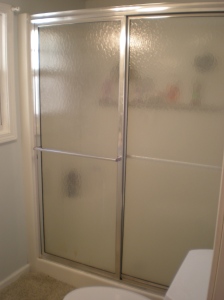
One of the first things that I wanted to replace were the NASTY, and I mean NASTY ,shower doors! My mom will be the first person to tell you that I’ve never been the best keeper of the bathroom. And for those of you who have been spared the funk of shower doors they are an absolute NIGHTMARE to keep clean (which was my excuse for not cleaning them;). Plus, they just weren’t making the bathroom look like a young couple was using the facilities on a daily basis. In short- THEY HAD TO GO!
The Proccess was fairly simple to remove the doors.
Supplies:
- Phillips screw driver.
- Small hammer
- Razor
- Sponge
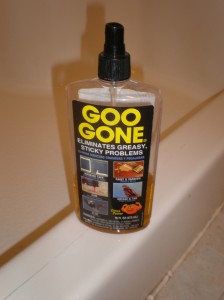
- Goo Gone
- Alex (inserted by Alex :))
Step One: I used a screw driver to remove the screws on both ends. There were only three on the sides for us, but you may have a screw or two on the bottom also.
Step Two: This is probably a step that most of you can skip, but whomever installed these shower doors didn’t want them to go anywhere. I had no problem getting the right side down. But the left side had a ton of caulk holding it in place, so reinforcements had to be called in. Once again, Alex came to the rescue. Not to brag, but Al is a pretty strong dude and he couldn’t even get the left side to come loose. I went digging in the tool box until I found my baby sledge-hammer, which is always perfect for any demo.
A few hard swings and it all came tumbling down.
Step Three: Once we had the actual doors down, the real work began – removing the 16 tubes of caulk that were used. I picked up a pack of razors ( and not razors you shave your legs with) for a little over a dollar and went to work scraping away (As long as you don’t press too hard this is totally safe to use on your tub or shower.). The large chunks were no problem for the razor, but……..
……the grimy leftovers weren’t wanting to budge. Never fear Goo Gone is here!!
A few squrits of the “magic potion” and the leftover caulk came right off.
Mission completed.
Or almost complete. Obviously, we needed some type of replacement if we didn’t want a flash flood warning issued in our bathroom. But that comes in part 2! 😉


Leaving your audience wanting more???? Okay next edition please!
WOW…!!!!!! I just love your blog! It inspires me! You and Alex are such a great team!!! I am looking forward to seeing the finished product of the bathroom!!!
Thanks Beth!!
ha, that shower door wasn’t that nasty. Nothing a good cleaning couldn’t have fixed. Altho, pitching the shower doors and replacing them instead of cleaning them does sound more fun. Keep up the good work.
Shhhhh! You aren’t supposed to reveal my real motives! haha!