Category Archives: Home Improvement

This One Goes Out to Mitch

Wow! It has been almost 6 months since we last updated. My apologies.  I started grad school about 6 months ago (shoot me) and combined with teaching and day to day life time was limited for hobbies. We really appreciate all the request for updates from our followers; especially Mitch – Alex’s stepdad, my amazing father-in-law. So this one goes out to you Mitchell T.

Even though I’ve been bogged down with school (teaching) and school (being a student) things have been poppin’ on Lynnwood. The biggest news is we finally finished “the side room”  a.k.a our family room! Really it was all Mitch, Alex, and Diana down the homestretch. I went on away with a few teachers to the beach on my fall break only to return to a completed living space! It was an awesome surprise and all my honey’s idea!

Rather than go into the  details of the finishing touches, I thought I’d post the progress pictures; from the beginning to the end.


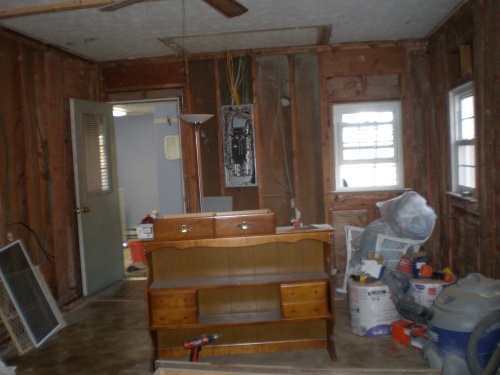
Side Room - Before

Demo

During


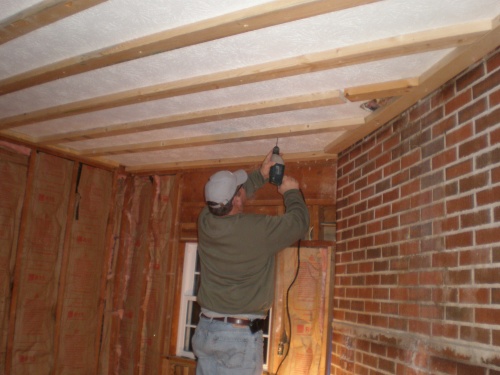
Mitch putting up the 2x4's

Mitch attaching 2x4's to drop the ceiling.


“Domestic Diva” tool belt.
Progress as of 3/12/10


Mud Time!


Drywall up and one sanding done.


Start of fireplace redesign.


Priming and Painting

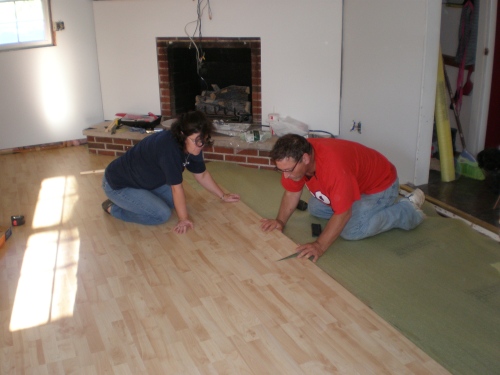
Floor going down.
Fireplace progress.
Finished!
Very nice!

So after a year and half we finally completed Our favorite room in the house. We’ve moved all of our old furniture in the room for now, although we’ll be purchasing a new couch for Christmas. We rarely leave the space. It’s just so cozy and so ours! Of course these pictures can’t tell half of the good memories (and a few nightmares)  that were made during this process. BIG, HUGE, GIGANTIC, HUMONGOUS thanks to Mitch and Diana, who without none of this would be possible. Extended thanks to Uncle Sam and the first time homeowners tax credit,  My Mom (Julie), David, Big Matt, Sarah, and of course Bella Corey Wells (supervisor).

2 Comments

Filed under DIY, Home Improvement, Remodel, The House

The Great Floor Debate

If you follow trends in interior design, or just observe what buyers are looking for in the housing market, you probably know that hardwood flooring is the most desirable type of flooring around. When Alex and I began our house search we were hoping to find something with hardwood or at the very least at least hardwood in a portion of the house. We lucked out though when we found our house on Lynnwood. The entire house (with the exception of the addition) had hardwood flooring. The only room that hard carpet was the “side room”. The carpet was in awful shape, so we knew right away flooring would be an investment.

Of course, hardwood flooring comes with a price tag and in most cases a hefty price tag. I wanted hardwood. Alex wanted something economical. Thankfully, we live in the 21st century and laminate is here to make us both happy! We shopped around at Lowe’s and Home depot and they did have some good deals, but Alex still wasn’t willing to “splurge”. He got on Lumber Liquidators website and found out that there is in fact a store in Lexington and they had some crazy deals!!

Not only did they have great prices but they had a very wide variety to choose from. Everything from laminate to bamboo flooring (one day my friend, one  day.). In the end we settled on a very light laminate from Utopia.

Is it the highest quality? Probably not, but it did come with a 10 year warranty. Is it exactly what we’ve always dreamed of having in our home? No, we actually are more cherry or mahogany people. But did it fit into our budget and look great. YES and YES! Including the padding (which helps control moisture) and 330 sq. feet of laminate, we spent a whopping $300.oo for our new floor! Alex was beyond thrilled with the savings and I was happy as a lark because I got what I wanted. 😉

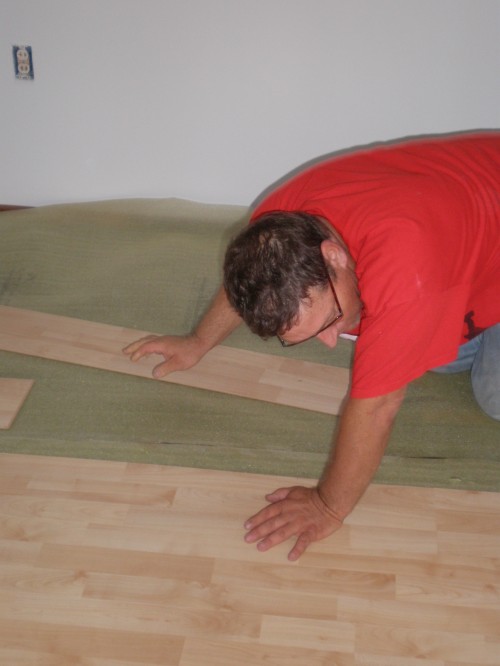
They offered professional insulation, which I would recommend if you haven’t laid laminate before or don’t have an amazing father-in-law to do it. Thankfully, I have the latter. Of course as my grandfather would say “you get what you pay for.” And we paid $300 for new flooring, meaning it wasn’t going to be a walk in the park to lay. The first four rows posed a problem. Because this room used to be a carport the floor is not exactly level, making it very difficult to get each piece in correctly. We also found on the Google people who had used Utopia also had problems getting the floor started, but after the first few rows things went very smoothly. It took Mitch and Alex about 6 hours to get the first four rows laid . Alex made me stay at my parents house because he thought I would flip out, so I don’t know a ton of details about the problems that occurred. After a good night’s rest, the next day was much more successful.

Because the fireplace sits at an angle Alex had to cut several of the pieces in order for them to fit just right.

It took us three days to purchase and lay the floor. I can’t tell you how amazing it is to walk to the shower on something else besides worn 1960’s linoleum. Not mention, along with the paint color (details to follow), the room is much lighter.

3 Comments

Filed under Home & Garden, Home Improvement, Remodel, The House, Uncategorized

How much can you get done in a week?

If  this question were posed to me two weeks ago, I would have said “not much”. But, since last Wednesday we have been busting it out in the side room, a.k.a the den, and I would now say we could build an entire room (or at least almost) in a week.

This time last week this is what the room looked like:

As you can see every seam has been covered with drywall mud and it had been sanded twice already.

Now, the way this show works is, Mitch and Diana (in-Laws of the century!) come over at night. Alex helps Mitch do the “man” stuff and Diana and I tell them how to do the “man” stuff. 🙂 Then at the end of the night I get a few projects I can complete the next day while I’m home enjoying summer break. My job on this day? Sand everything on the lower half of the room. Sounded easy enough. I just needed the 220 grit drywall sandpaper and a mask. I’m sure this task would have been easy for a person who can actually breath during normal life, but since my asthma and allergies make my life hell, this was grueling for me. I doubled up on the masks and wore safety glasses. Three hours later   ( it should not have taken that long) I had finally finished.

That night Mitch and Alex finished the upper portion of the room. After a quick cleanup the space was starting to look like an actual room.

My kitchen table on the other hand…….

My Kitchen Table

needed some serious help, as did the rest of our house! Everything was covered in drywall dust, it looked like our house had been abandoned for 30 years and the floors were even worse. Luckily for me Ms. Diana is an expert cleaner ( she doesn’t miss a speck of dirt) which is nice when your house is in the shape our’s was.

Leave a comment

Filed under DIY, Home Improvement, Remodel, The House

Café Lynnwood- Chapter 3 The Final Reveal

Over the past week we’ve revealed parts of our kitchen renew. We started the basics – paint and cabinets– and the last Café Lynnwood post showed off our AWESOME wine rack that Mitch made us. Now it’s time for Chapter 3- The Final Reveal. Although, final is used very loosely here because I’ll come up with some other project for the kitchen soon (actually, I already have a few small things brewing).  🙂

One thing I really wanted to avoid when I started to accessorize was the “Italian kitchen” look. Don’t get me wrong this looks great in some people’s houses, but it just wouldn’t work for us. The second thing I wanted to avoid was spending a lot of money. Luckily, we got some really amazing wedding gifts that were neutral and would work great in our new kitchen. Like the my beehive canisters (my very favorite gifts!) from a local gift shop.

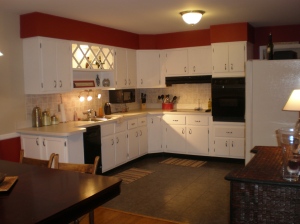
Cabinets After

I got our mahogany table at an estate sale. It wasn’t cheap (as Alex will tell you) by any means, but I think a space needs one expensive piece to make it pop and if you work your budget right  you can make it happen. The table fit perfectly in the eat in area. I didn’t get the matching chairs at the auction, but I follow the rule of avoiding the catalog look so it worked out fine. The chairs you see at the table I found, once again, in my grandmother’s basement. Not exactly what I wanted, but they work for now. We installed an updated fixture and hung a HUGE clock that I found for about 100 bucks at Garden Ridge. We also added blinds and a set of the perfect Better Homes & Gardens curtains (Wal-Mart. Super cheap).

Eat in area - Before

Eat in area - After

Everything else, I’ve just  picked up along the way. For instance, I was driving down main street one day and saw a wicker cabinet outside of an antique shop. It was love and first sight.  With an oval mirror (again, a wedding gift) it works as the perfect foyer area and offers extra storage.

So far Café Lynnwood has hosted two successful Thanksgiving Dinners, a slew of get togethers with friends and supper at least a few times a week (still working on the cooking bit).We’re pretty happy with how the space turned out. It’s the first room we finished and we think the updates really add a lot to our home. Here are the “Befores and Afters”:

Before

After

 Eat in Area - Before

Eat in area - Before

Eat in area - After

Cabinets - Before

Cabinets - After

Awkward Space - Before

Awkward Space - After Amazing Wine Rack

3 Comments

Filed under Alex and Sara, Design, Home Improvement, The House, Uncategorized

Café Lynnwood – Chapter 2

If you missed Café Lynnwood – Chapter 1 make sure you check it out  for details on our paint choices and cheap cabinet makeover.

Again, with our budget being limited and knowing that one day we’ll probably do a mass rehaul of the kitchen, we didn’t want to spend a lot of money on the backsplash. The in-laws once again came to the rescue and suggested that we checkout the bead board that looks like tile. I’ll admit I wasn’t  completely sold on the idea, but once I saw what they were talking about I was in. Mitch volunteered to measure and cut each piece to size and install everything. He used a few small tack nails (which I can’t even find now) and liquid nails to secure everything into place. Then he went along and used caulk to finish everything off. In the end we spent about 100 bucks, which may seem like a lot, but not when you consider the cost of tiling the entire area.

   Backsplash

Backsplash

But the  awkward space was, well, still awkward. When the addition was added to create a second bathroom and the laundry room, the kitchen lost the window above the sink.  We loved the extra square footage created by the addition, but we did not love the open space left by the forgotten window.all put our heads together and to come up a solution. A cabinet wasn’t really an option, because I didn’t want to lose the light above the sink. Shelves would work, but we wanted something that was functional but also looked good.

Inspired by our sudden interest in wine, we decided to sketch out a custom wine rack that would also incorporate a shelf and additional lighting. Once we had an idea of what we wanted we went to The Man, a.k.a Mitch, and he went to work hand crafting our wine rack. We used gift cards we had gotten for Christmas to help purchase the new light fixtures that would be added to the rack, for both functional and visual appeal. Once Mitch was finished Alex helped him secure everything in place and move electric stuff around (I honestly have no idea what they did to make the lights work, but they work.) In the end we ended up with a great new feature that looks like it has been our house for  50+ years.

Before

After (Our wine supply is a bit low.)

7 Comments

Filed under DIY, Home & Garden, Home Improvement, Remodel, The House, Uncategorized

Bored? Go to RUPP!

No, unfortunately, there isn’t any basketball action happening, but there are some  great home improvement ideas in Rupp this weekend. Alex and I just got back from the annual home and garden show that’s being held in Heritage Hall (Lexington Center) and Rupp Arena. Besides getting some delicious honey roasted almonds, we signed up for a slew of free bath makeovers (because the  bath, that I won’t even show you all, is in desperate need of some help), got some great ideas for the patio, and learned lots of ways to make our house more energy-efficient. The show runs through Sunday, so if you’re in Central Kentucky, and aren’t going to Keenland, I’d recommend checking it out!

2 Comments

Filed under Home & Garden, Home Improvement, Inspiration, Uncategorized

Café Lynnwood – Chapter 1

For almost everyone kitchens and baths sell a house. Unless you’re us. The kitchen and baths were a mess, but we loved the good bones they all had and new cheap remodel would do each space wonders.

The first thing on the list for the kitchen remodel/renew was to get all of the flowered wallpaper down. If you have ever removed wallpaper you know what a nightmare this was since it was put up with paste and covered THE ENTIRE kitchen. Luckily, we had the help of Alex’s super amazing parents and our good friend Andrew a.k.a  Sosbizzle. So we managed to knock it out pretty quickly. But that didn’t stop me from declaring to NEVER EVER PUT WALLPAPER UP in a house.


Eat in area - after wallpaper removal

Although, most of you may make think I have a serious thing for blues and cool colors, I’ve actually had a long time love affair with red. Of course it had to make an appearance somewhere in our house and I couldn’t think of anything better than a red kitchen. Alex on the other hand wasn’t feeling my idea.  But we compromised and I let him pick out the shade of red, Burning Bush (by Olympic ), and we both ended up happy. We also added the Khaki color (also from Olympic)  that would be in our temporary living room/future dining room for two reasons: 1.) A bold rich color can takeover and be too much and 2.) the kitchen and living room are an open concept, so by brining the same colored used in the living room into the kitchen we were able to open up the two spaces even more.  We put the Khaki on the top portion of the eat- in area of the kitchen and the Burning Bush on the bottom.

We went ahead and moved in without making any other changes, but within a week of getting settled  we started on the cabinets. The budget for this project (like all of our projects) was limited and while we would have loved to put in brand new cabinets and countertops, our dolla bills just wouldn’t stretch that far.

Adding a simple coat or two of white paint (which we already had from painting the trim) gave the cabinets and immediate face lift and Diana (Alex’s madre) I painted everything in one  night. My mom and I made a trip to Lowe’s where we were able to find more modern, yet, still traditional, hardware for the cabinets. I was almost knocked out by how expensive handles for cabinetry are, but we were able to save some money by skipping the hinges and using a metal spray paint (in nickel) on each hinge to match the other  our new handles.

Cabinets Before

Cabinets After

So there you have Café Lynnwood – Chapter 1( our paint projects). There are still a few projects the helped transform “their kitchen” into “our kitchen”.

1 Comment

Filed under Alex and Sara, Home Improvement, Remodel, The House, Uncategorized

Mission OG – SB 2K10

The main project that I wanted to focus on this week was our garage. Mission Organize  the Garage – Spring Break 2010 is in full effect. Thank goodness, I can’t find anything in that mess!

As you can see this is going to be a little time-consuming.

Leave a comment

Filed under Home & Garden, Home Improvement, The House, Uncategorized

“Renewing the Back Bath”- Part 1

Three weeks, or so, ago I posted our weekly plans, which included painting the back bathroom. I promise it wasn’t just a random post. It took me a while to find the mojo to get going. Especially after all those stripes. But I gathered all my supplies and set out to “Renew the Back Bath” .  The space is relatively new compared to the rest of the house, so just a few minor touch ups were needed.

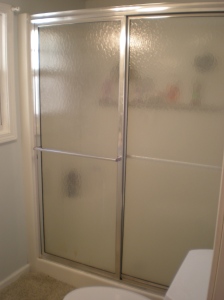
One of the first things that I wanted to replace were the NASTY, and I mean NASTY ,shower doors!  My mom will be the first person to tell you that I’ve never been the best keeper of the bathroom.  And for those of you who have been spared the funk of shower doors they are an absolute NIGHTMARE to keep clean (which was my excuse for not cleaning them;). Plus, they just weren’t making the bathroom look like a young couple was using the facilities on a daily basis. In short- THEY HAD TO GO!

This was the "clean end".....YUCK!

The Proccess was fairly simple to remove the doors.

Supplies:

  • Phillips screw driver.
  • Small hammer
  • Razor
  • Sponge
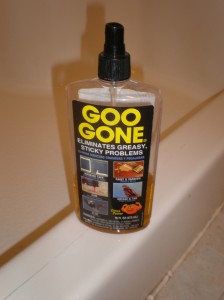
  • Goo Gone
  • Alex (inserted by Alex :))

Step One: I used a screw driver to remove the screws on both ends. There were only three on the sides for us, but you may have a screw or two on the bottom also.

Step Two: This is probably a step that most of you can skip, but whomever installed these shower doors didn’t want them to go anywhere. I had no problem getting the right side down. But the left side had a ton of caulk holding it in place, so reinforcements had to be called in. Once again, Alex came to the rescue. Not to brag, but Al is a pretty strong dude and he couldn’t even get the left side to come loose. I went digging in the tool box until I found my baby sledge-hammer, which is always perfect for any demo.

 Doin' Work Son!

Doin' Work Son!

A few hard swings and it all came tumbling down.

Step Three: Once we had the actual doors down, the real work began – removing the 16 tubes of caulk that were used. I picked up a pack of razors ( and not razors you shave your legs with) for a little over a dollar and went to work scraping away (As long as you don’t press too hard this is totally safe to use on your tub or shower.). The large chunks were no problem for the razor, but……..

……the grimy leftovers weren’t wanting to budge. Never fear Goo Gone is here!!

A few squrits of the “magic potion” and the leftover caulk came right off.

Mission completed.

Or almost complete. Obviously, we needed some type of replacement if we didn’t want a flash flood warning issued in our bathroom. But that comes in part 2! 😉

5 Comments

Filed under DIY, Home Improvement, Remodel, Uncategorized

WEEKEND GETAWAY

I am super pumped for this weekend because I’m escaping with my two BEST BEST FRIENDS in the entire world!! It’s been forever since it’s been just us girls and I couldn’t need this any more. We’re headed to “Da Ville” for a little fun. They’re both hitting up a wedding, while I’m going to hit up a couple of stores I’ve been anxiously waiting to visit, including my first trip toZ Gallerie !!!!!!!

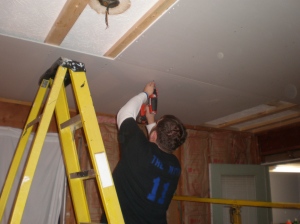
While I’m off enjoying myself, Alex and Mitch will be hitting the side room hard (or at least thats what Al is telling me).  Earlier in the week I posted some pictures of our progress, but we’ve actually made it a little further than the last picutre showed. Because the ceiling was in such bad shape we decieded to drop the ceiling 2″. Al and Mitch framed out the ceiling with 2 x 4’s.

 Mitch putting up the 2x4's

Mitch putting up the 2x4's

And then the screwed all the drywall up. Of course the room has an odd shape so it took a little more time than expected. But the biggest problem has been a leak on the chimney. The leak has been located, thanks to myself (or at least I think so). I squirmed myself up into our attic to do some inspection and helped Mitch locate the problem. So, after doing some patching and repair, we have one last portion of drywall to add to the ceiling.

 Alex hard @ work.

Alex hard @ work!

"Domestic Diva" tool belt.

That small hole is the leak.

Diana and I already inserted all of the insulation (TAX CREDIT!)  since behind the layers and layers of paneling there wasn’t any. It made a difference immeditly, I can only imagine how much warmer it will be when all the walls are up.  But until then, this is where we are as of March 13th – 48 days until Derby. Times a tickin’!

Progress as of 3/13/10

Leave a comment

Filed under DIY, Home Improvement, Remodel, The House, Uncategorized